Showing posts with label Homestead Projects. Show all posts

Monday, January 12, 2015

Make your own DIY Driftwood Mirror


It's no secret among my nearest and dearest that I am obsessed with driftwood. It's already beautiful, you don't have to do anything to it! I make so many things with driftwood, from toilet paper holders and jewelry stands to picture frames and pan racks. If you are lucky enough to live near a source of driftwood, there are countless objects that are waiting to be turned into something useful and one-of-a-kind. By YOU.

That said, there are a few things about working with driftwood that can be challenging. This mirror, for example, I had to make and re-make a few times before it was sturdy. I started with a glue gun, like a usually do. No good. The smooth surface of the mirror and the uneven texture of the wood was not a good match. I ended up using a super strong rubber cement which barely holds. Now with other mirrors that I've made for people, I use a wooden backing, like plywood, Cement the mirror (that is smaller than the backing) to the backing, and then screw or finish nail the pieces to the wood that is surrounding the mirror. Much better plan.

Vegetable Garden 2014

Well its January again, and I'm finally finding time to put up some gardening posts. I just sent away my seed order, hopefully Fedco will be able to read my writing despite all the drool. I just cant help myself with seed catalogs. I go crazy. I try to practice frugal living, but always overspend on seeds. Like a kid in a candy shop. I think I ordered 7 varieties of tomatoes. SEVEN. Seriously? I have a problem.

So here are some photos and lessons learned from the Woven Willow Veggie garden of 2014:


This year we expanded the garden a bit and put a nice cedar post fence around it. We don't seem to have a deer problem yet, the fence was mostly for my toddler who loves to stomp on seedlings.
I generally do block planting because I like the impactful, compartmentalized look of it. Plus its easy to have raised beds that way. And, since I'm not good at keeping a record, Its easier to remember what went where for the sake of crop rotation. I am a huge fan of raised beds for a couple reasons. One, I live in coastal Maine, zone 5b, where we have an annoyingly short growing season. Raised beds are higher and they thaw faster in the spring. Two, for some reason they seem to have much fewer pest problems, and when they do have pests, they are easy to segregate with netting or row cover. Three, they are slightly easier to plant and weed since you have to bend down a bit less. I have a trusty stool that I keep in the garden and it works great.
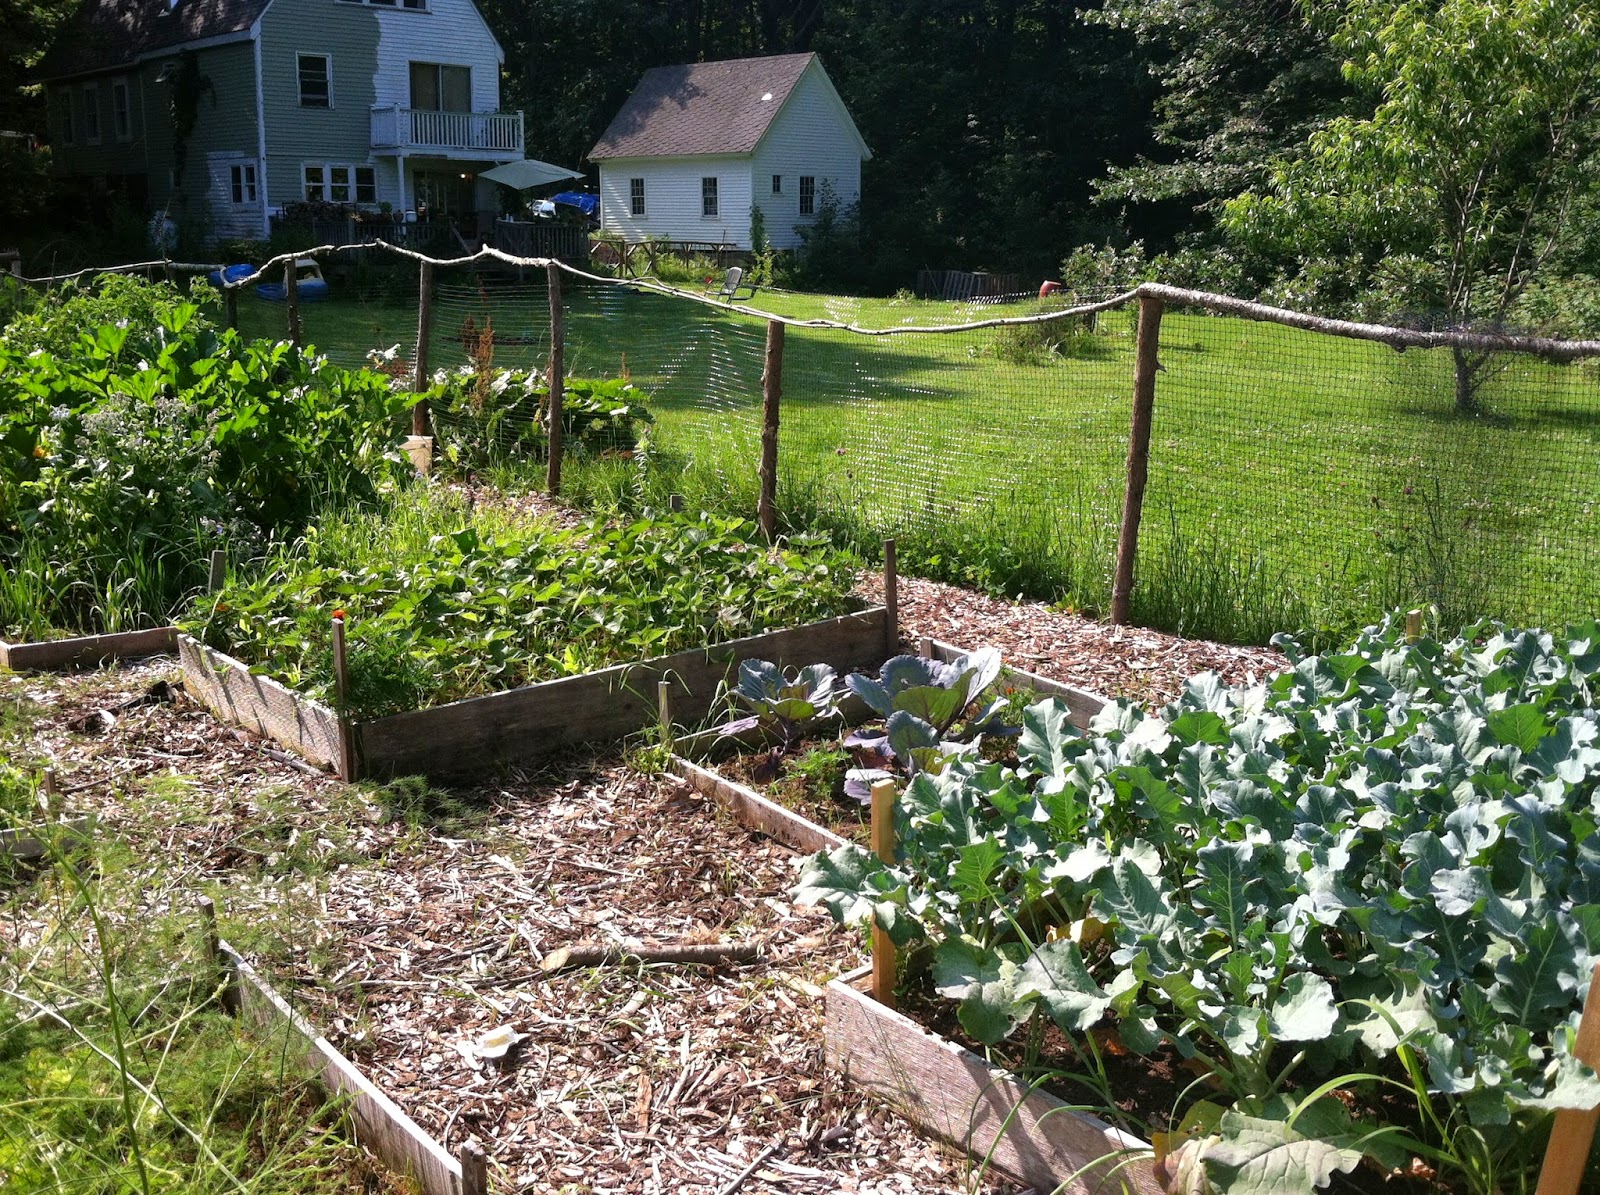
 This year we also put in wood chip paths. When the treec-cutter guys went by in their big limbing truck, I flagged them down and gave them some freshly baked blueberry muffins. In return, I got 5 yards of free woodchips delivered to my driveway. YES! The jury is still out on whether this was a waste of time.  I am always looking for ways to cut down on unnecessary work and I figured some black plastic weed mat and cardboard with wood chips on top would remove my need to ever deal with the pathways again. Not so. Under the plastic and thick cardboard and 6 inches of woodchips was crab grass. Crab grass would survive a nuclear apocalypse. All was good until two months later when I found that I was weeding the damn paths almost as much as the garden. I might revert back to mowing but I haven't decided. Certainly not round-up. Monsanto has no place in my garden.

Here is my first attempt at growing melons. It worked, kind of. I didn't pay enough attention to them and I got a couple this size, then a vole or something came and hollowed it out.\

 Brussels sprouts in June.


Borage. I LOVE this plant. Its easy, gorgeous, edible and it attracts tons of beneficial insects. It reseeds, too. Good companion for tomatoes. I also interplant marigolds all throughout my veggie garden. They are a cinch to grow from seed, transplant well, deter pests and when the garden is looking all tired in September, they are huge and in full swing. Same with Zinnia and cosmos.


Husk Cherries! Aka Ground Cherries, Aka Pineapple tomatillos. These are natures candy, I do not understand why they are so obscure. They are freaking delicious. They take some patience to start from seed but once established, they produce like crazy. Great toddler food. Keeps them busy for ages while they take each little fruit out of its house.


The two photos above show my tomato experiment, at least the early part of it. If I had taken later photos, you would easily see which method won. The one above with the 2x4s is what I will be sticking with. The idea is that you build a tall STRONG frame and plant your tomatoes beneath it. As they grow, you prune them to a single stem, clipping all the suckers from the crotches of the leaves. Then when they are about a foot or so, wind a string loosely around the base, and wind loosely up the stalk and tie the string way above to the support. Then as the plant gets taller, wind the plant around the string so it climbs. Works great, no messy crowded cages and its easy. Word to the wise: Unless your growing only a few tomato plants and they are light ones, like cherry or grape, don't get cheap and lazy like I did in the second photo. That flimsy twig structure served the same purpose but flopped over way before the tomatoes were even ripe. Fail.


Last lesson I will impart to you for summer of 2014: If you are growing beautiful squashes, like these tasty, buttery Sebring Zukes and you see groups of little copper colored eggs on the underside of the leaves, DONT just spray them with safer soap and call it good like I did. Those eggs, as I later found out, belong to the dreaded squash bug, the likes of which I had never seen before. If I had DESTROYED them the second I saw them, maybe a single one of my squashes would have survived. Instead, they took over every squash plant in my whole garden, armies of these little gray aphid looking things that grew into huge gray stink bug looking things. They suck the sap from the vegetation and cause the plant to wilt and die, then they attack the fruit. And they multiply like crazy. I hate them, hate them, hate them. They caused me to have to buy zucchini. From the grocery store. In AUGUST. With money. Ugh.

Backyard: BEFORE and AFTER

I am a REALLY big fan of before and after photos. That's because I am an instant gratification type person. I will choose the glue gun and the staple gun over the needle and thread almost every time. I know its only been two years, less even, since we bought this place, but I'm quite proud of what we've accomplished so far, especially with not much money and two babies in tow. So here the backyard when we were just looking to buy this place:

BEFORE:


And here is the same view two summers later:


Pretty satisfying, right? I think so.

Friday, January 9, 2015

DIY Vintage Mason Jar Light


Okay, Okay, I know my love affair with vintage mason jars is nothing new or original, especially among homesteaders and DIY enthusiasts who have expounded on their virtues for ages. Still, I never tire of seeing these things around our house, being put to various uses. I use them everywhere, from starting new houseplants to holding lentils in my pantry. They just make me happy to look at them. In an age of mass produced, cheap crap, they evoke a sense of timeless quality. Plus each one has a history about which you will never know, especially if you picked them up at a yard sale or something. They might have held the pickled beets that got a family through the great depression. They are special objects.

This is one of my latest uses for one my collection. I used a modern canning lid collar to hold it on, rather than cutting a hole in the original lid. The light was already installed, I just switched out the shade with the jar and used a smaller bulb so that it would fit inside the jar. Simple project.

Monday, December 16, 2013

New Garden IN!


The new garden: tilled, tamped, mounded, fertilized and planted! What a glorious feeling that was. Now that its the middle of December, I remember only the satisfaction and not so much the hard work. Putting in a new garden where there was none seems to have both pros and cons. Cons: Digging up sod sucks, soil needs lots of amendment usually. Pro: Its need and clean without years of weed seeds built up, and it doesn't have an established population of pests! Almost no slug problem, unlike our last home. We did, however have a lot of rain this summer, which was very helpful for irrigation but we had a terrible earwig problem. I never knew earwigs could be a problem! They eat everything, they are not picky. The ate holes in all my cabbages and hid under the leaves. Super gross. We also had quite a few tomato hornworms but I guess they are a problem almost anywhere. And mice. I guess we should get a cat but I really am a dog person.

We had pretty good success this year with our crops. A few things did better than others, perhaps I should pay better attention to crop siting and companion planting. I always need to remember to space out my tomatoes farther. They are always to close together and get tangled up and hard to harvest. I thought 18 inches would do it, but 3 feet would be better.

We are now enjoying a freezer full homegrown veggies and blueberries! Its seed catalog time again, and I will soon be drooling and circling everything in the book with my highlighter...

Monday, February 11, 2013

Homesteading Essentials


There is something truly satisfying in feeding your family directly from your hard work. In cutting out the middle man (the grocery store) you can spend your time doing real and honest WORK. Work that has a direct part in sustaining your family. That is truly gratifying. Instead of spending forty hours a week doing (sometimes inane) tasks in order to acquire money to trade for food from far away that you have go to the store and retrieve..the whole process is so much more abstract and removed that it has to be.

1) Grow food.
2) Put it in the mouths of your family.

And that's that. Beautifully simple.

Don't get me wrong, money is essential in this culture. But the more you can circumvent the "extractive economy" as Shannon Hayes calls it, the more time you have (and the richer that time is) with your family. I would much rather be pulling weeds with my children playing nearby than typing up spreadsheets in a cubicle while some childcare provider cares for them.

Anyway, here is the point of my post, thanks for being patient while I zigzag to it. I have been compiling a collection of homesteading tools and essentials that might be of interest to anyone heading down the semi-self-reliance path. I am finding that much of my efforts are going toward making the most of what we already have and stretching the ever-elusive dollar. Feel free to add suggestions!

Kitchen:

  • A good water bath canner (kettle)
  • Canning rack
  • Jar lifter
  • Good set of jars ( I like a variety of sizes with one size mouth to make lid replacement easy)
  • Pressure canner/cooker
  • Good jars can also be used for food storage instead of tupperware. (It's clear, so you can see what in it, and it doesn't have harmful plastic chemicals.
  • A chest freezer. (These days they can be had for a good price and are not too pricey to run. You can save a TON of money by putting up your harvest or buying in bulk from local farmers. Plus its like having a grocery store in your house. Save some gas! I use color-coded reusable grocery bags to organize the chest freezer into meat, veggies, seafood, and others to make it easier to remember what I have. 
  • Boxes, sand and shelving for root cellaring.
Home:
  • A good quality clothes line. You wouldn't believe how much money you can save by not using a dryer. I must admit, though, its nice to have one when its raining or when you are raising babies with cloth diapers. 
  • A woodstove. So important if you live in a cold climate and in an area where the power goes out frequently. Plus you can cook on it if you have an electric range and the power is out. It is NOT fun to be cold and hungry.
  • A sewing machine
  • A set of basic reliable tools
  • Snow shovel, even if you live in a warm climate you never know these days!
  • Water jugs (always full)
  • A ladder
  • An axe or splitting maul
  • A generator (for peace of mind when you have a chest freezer full of your year's work)
Garden:
  • A set of good garden tools: including a quality shovel, hoe, hoses, trowel, rake, big wheelbarrow, tarps
  • Rain barrels and gutters (if you want to get fancy. I don't have these set up yet but when it happens, it will get its own post.)
Other great things to have:
  • A pickup truck, or access to one: You can save so much money by getting furniture and salvage materials at yard sales or on craigslist. If you can move them. Try borrowing one from a friend and giving them fresh eggs/produce in return. 
  • A bike! No gas necessary.
  • chains and a winch (for getting stuck or moving heavy objects)
  • A tractor if your loaded. No need to expound on the virtues of a tractor. 
  • A skil (circular) saw and a good cordless drill. Few projects are beyond your reach with these. 
  • A computer with access to YOUTUBE. I have learned how to do countless things right in my living room, from hand-tossing a pizza to tiling a shower. Youtube is seriously empowering. 


Tuesday, February 5, 2013

The Farm (Before)

Well, "before" is actually now. I am a big fan of before and after photos. They give you a sense of instant gratification, even if the gratification wasn't so instant in reality. You'll just have to be patient and wait for the after photos. We just bought this old renovated farm house (originally built in 1859) and this will be the site of our semi-subsistence quasi-homestead project. Woven Willow Farm. Two acres ought to be enough. I just learned that almost a half acre is already covered with native Maine low bush blueberries, and there are 4 immature apple trees on the property! Score! ( Not to mention an existing chicken coop and a badass tree house).